Setup D-LINK N300 Wi-Fi Extender DAP-1330 is a wall-plug Wi-Fi range extender that can be placed anywhere in your home to extend an existing Wi-Fi network. This small yet powerful D-LINK N300 Wi-Fi Extender provides up to 300 Mbps connection speeds while remaining backwards compatible with your existing wireless devices.
Steps to Setup D-LINK N300 DAP-1330 Using Your Browser
- Connect the extender to a wall outlet that is within your router’s wifi range.
- On your PC, open the wireless utility, pick the extender network’s name (SSID), and input the password.
Note: Both of these can be found on the included WiFi configuration card or on the sticker on the bottom of the device
- Then, on a web browser, type http://dlinkap.local in the address bar. You can also use http://192.168.0.50 as an IP address.
- The Wi-Fi Connection Setup Wizard will automatically launch if this is your first time configuring the extender. Otherwise, you should leave the Admin Password box empty. Log in by clicking the Log In button.
- Select D-LINK Setup Wizard from the drop-down menu.
- Press the Next button.
- To quickly connect your extender to an uplink router, use Wi-Fi Protected Setup (WPS). Select the second option from the D-LINK N300 setup wizard menu to manually configure your network. To continue, click Next.
- From the list, click on the wireless network that you want to utilize as your uplink (source). Select the uplink network you want to utilize when you’ve chosen it.
- Enter the Wi-Fi password of your uplink network. To continue, click Next.
- The extender will re-broadcast the uplink router’s Wi-Fi connection as an extended Wi-Fi network. Enter the SSID (network name) and password for the extended Wi-Fi network you want to use. Check the box at the bottom of the screen if you want the uplink router Wi-Fi network and the extended Wi-Fi network to have the same SSID and password. To continue, click Next.
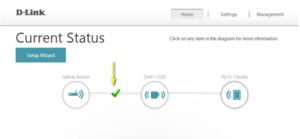
- The installation is now complete. The settings for both the connection to the uplink router and the extended Wi-Fi network will appear on a summary page. It’s a good idea to keep track of this information for future reference.
A green check mark between the Uplink Router and Extender symbols shows that the uplink router and extender are connecting successfully.
Steps to Setup D-LINK N300 Using WPS Method
- Select the first option from the setup wizard menu if you wish to setup the DAP-1330 extender utilizing WPS procedures. After that, click ‘Next’ to proceed.
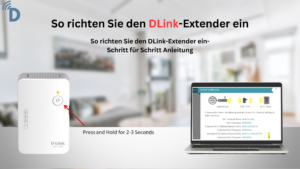
- For this, the D-LINK N300 DAP-1330 employs the push-button approach. So, after selecting WPS, you’ll need to click the WPS push button. On the router or access point you want to connect to the extender, there is a button.
- You’ve got 120 seconds to press this button. When you’re done, click ‘Next’ to begin the process.
- If you are successful in connecting, you will see a message on your screen. The device’s LED will also become solid green.
- If the LED is pure amber after you’ve connected it, it means the extender isn’t working properly. Connect the extender to a wall outlet that is closer to the access point or router to increase the quality of your connection.
- On the side of the DLINK DAP-1330 Extender is a WPS button. This can be used to establish a connection with the router. You will have 120 seconds after pressing the button to press the button on the router or access point.
You’ll notice that the extender’s LED has turned solid green. This indicates that a connection with the uplink router has been establish.